Sales Lead (Cont’d), Quotes, Templates
For a new Sales Lead Profile, you’ll only see the ‘New Quote’ button. Clicking on it opens a window where we will start to deal with the ‘what we’ll do, what we’ll charge’ aspect of the process.
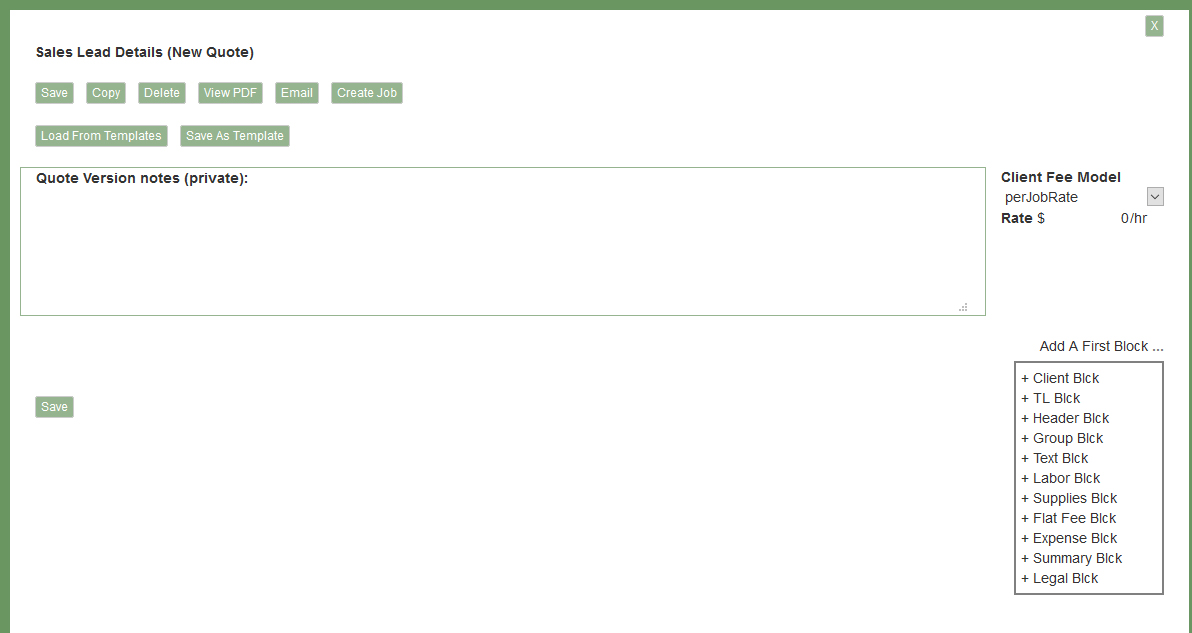
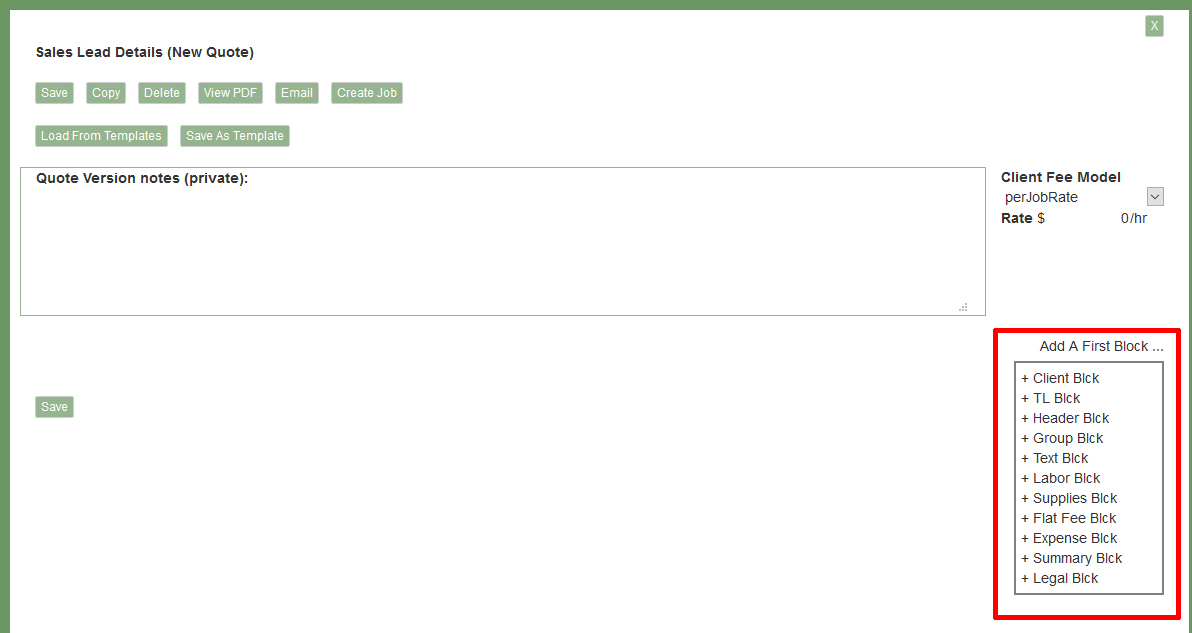
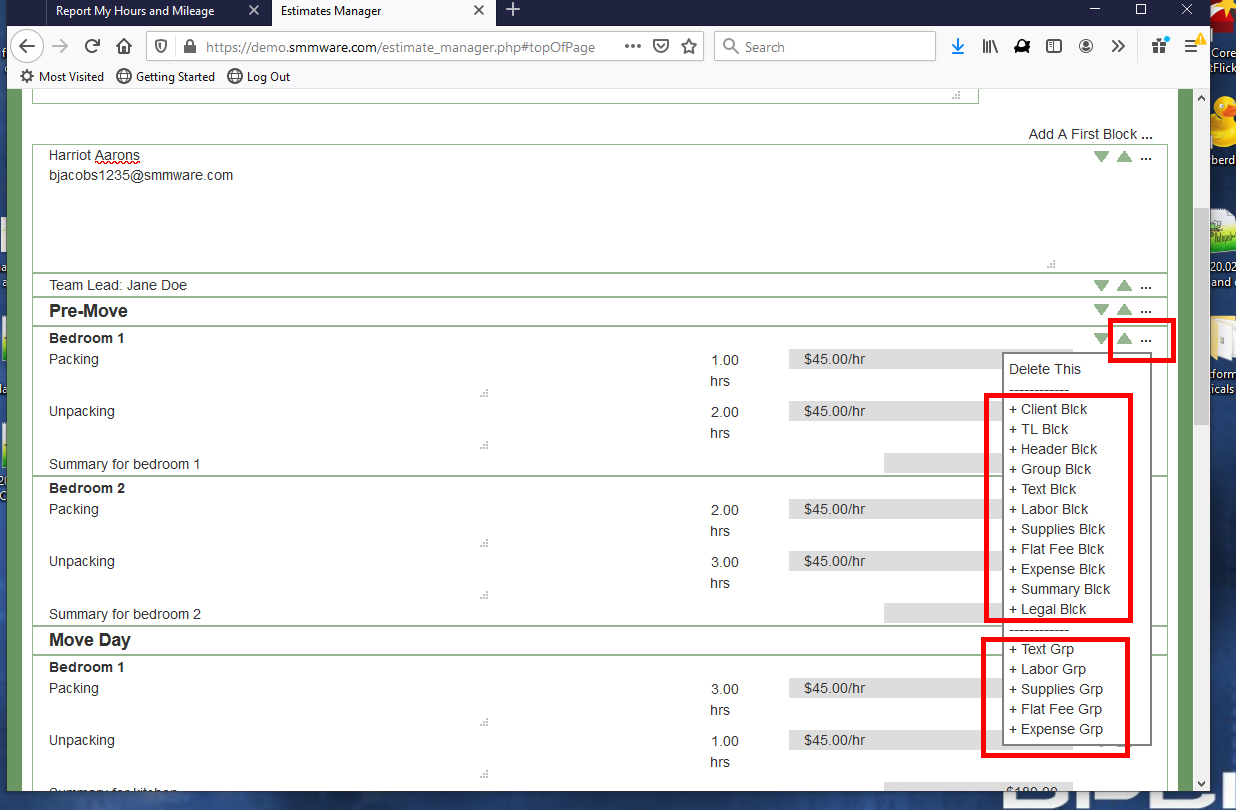
A SMMware quote is built of blocks, and SMMware provides you with a variety of block types. Creating a quote is a question of mixing and matching those blocks to suit your specific needs. For a new, blank quote, clicking on the three dots next to ‘Add a First Block’ brings up the list of blocks.
If you create more than one version of a quote, you’ll find the “Quote Version Notes” field handy, as you can describe to yourself how this version is different than the last.
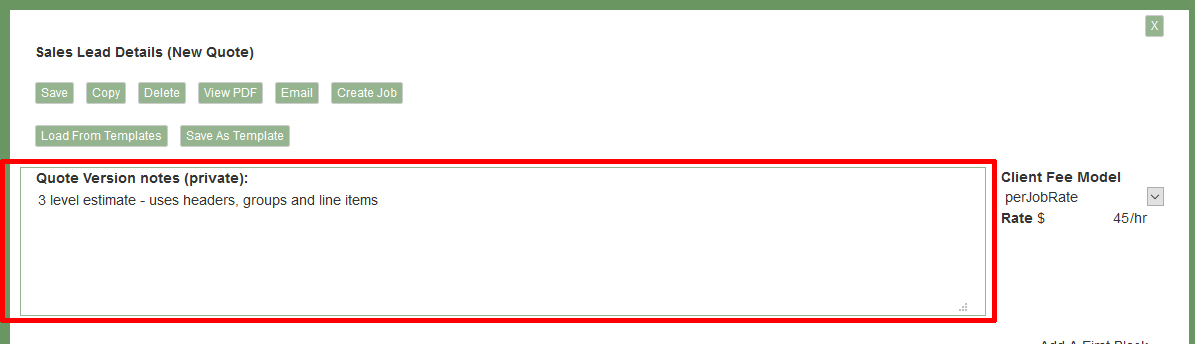
As you might expect, the approaches to pricing in the Quotes matches that found in Jobs. You can either charge a client the same rate for the whole job (a ‘per job’ rate), or you can charge different rates depending on the type of work being done per ‘Job Codes’. You can choose which approach using the ‘Client Fee Model’ dropdown seen below.

Once you have developed a quote, if you feel that it is a good starting point for future quotes for other clients, you can save it as a ‘template’. Next time you start a quote, instead of starting from scratch, clicking on ‘Load Template’ brings up the list of templates to choose from. Selecting one will bring the blocks from that template, and you can modify it from there.
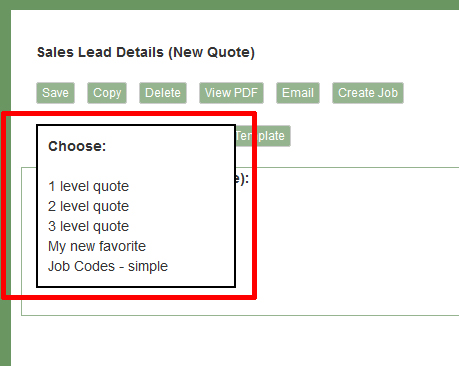
One approach to templates might be ‘Small Job’, ‘Medium Job’, ‘Big Job’. Or perhaps ‘Pack Job’, ‘Downsizing Job’ and other task specific entries. Or you might build a really long master version with ‘everything but the kitchen sink’, such that you can quickly delete the things you don’t need.
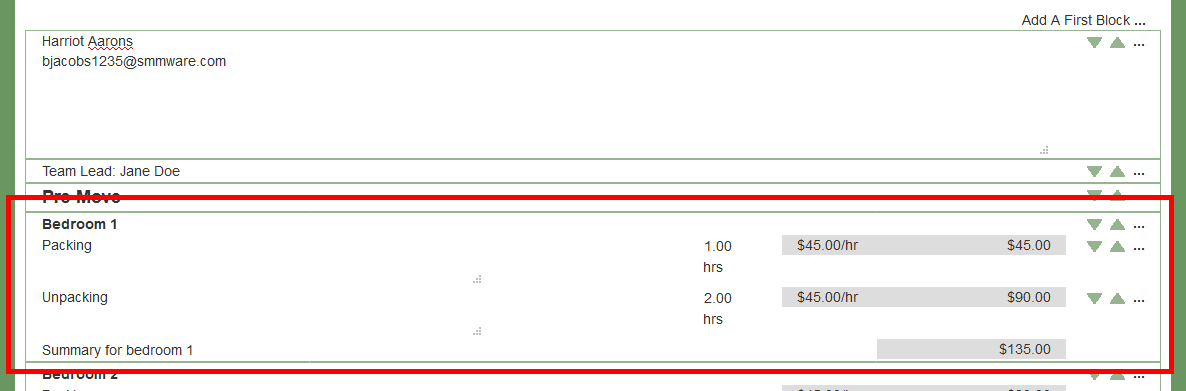
Below is a more developed example of a quote. We’ll use it to explain about the different block types next. Most areas that do not have a grey background are editable.
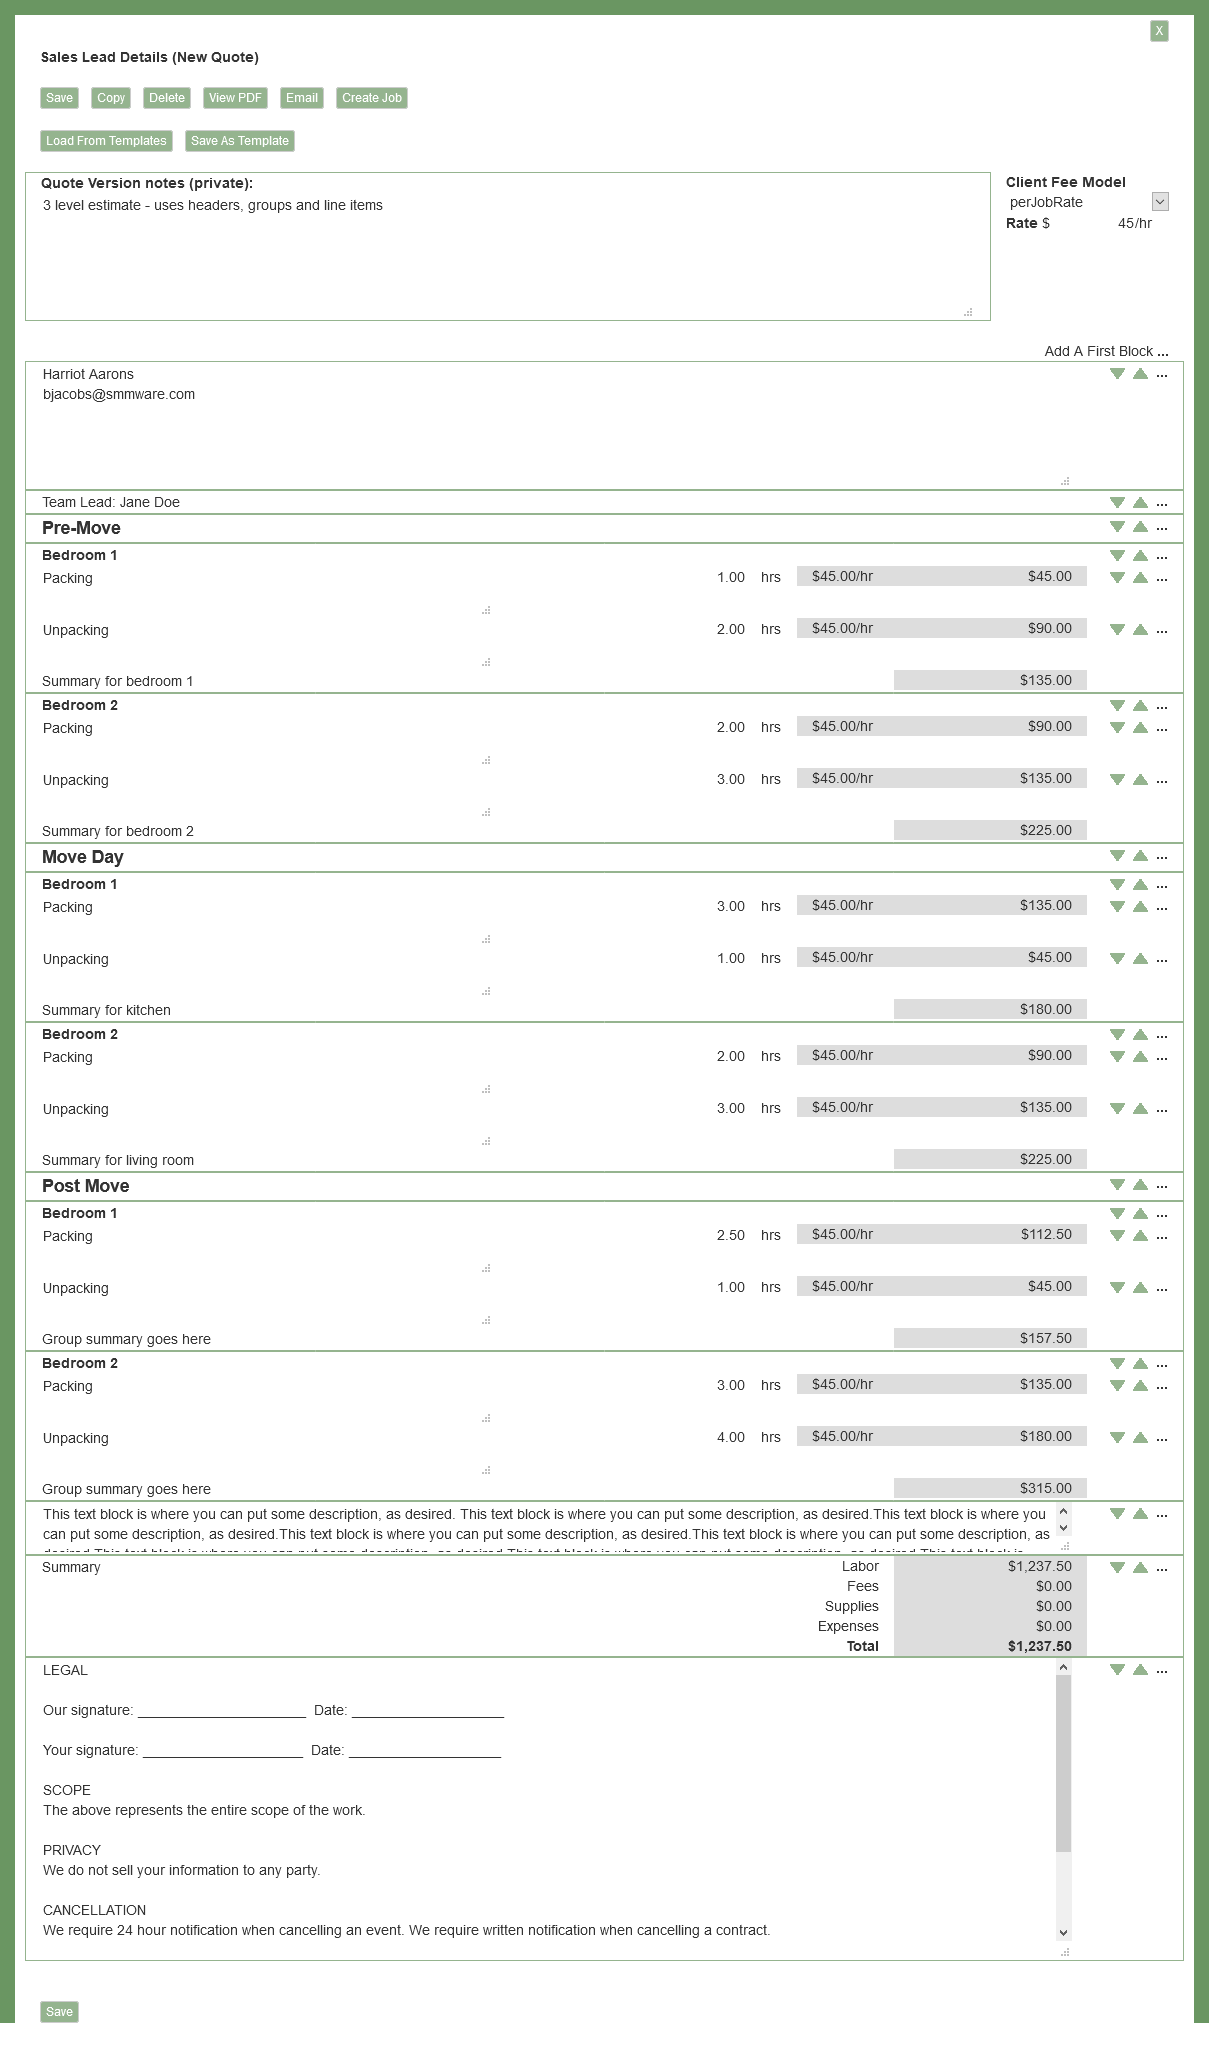
The ‘Client block’ pulls in the client name, address, and phone number, so that you don’t have to find it elsewhere and cut and paste it into place.
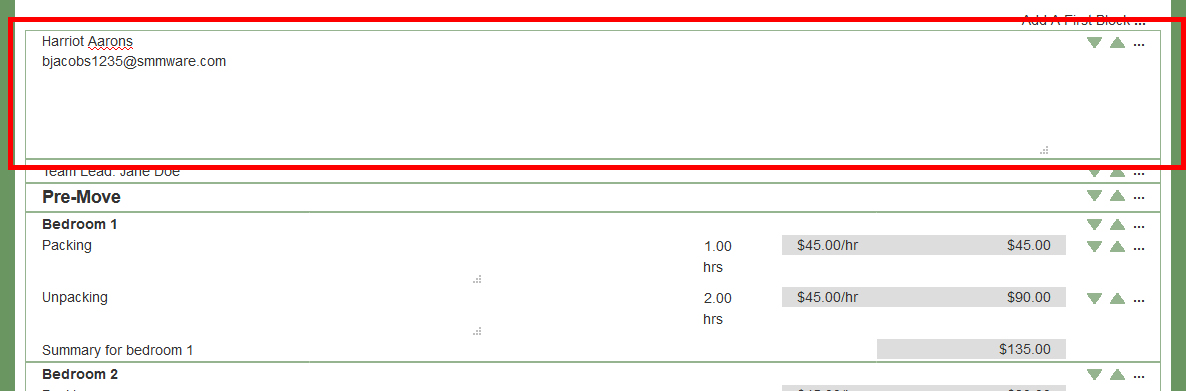
The ‘Team Lead’ block gives you a place to indicate a team lead, if your company wants to include that in the quote.
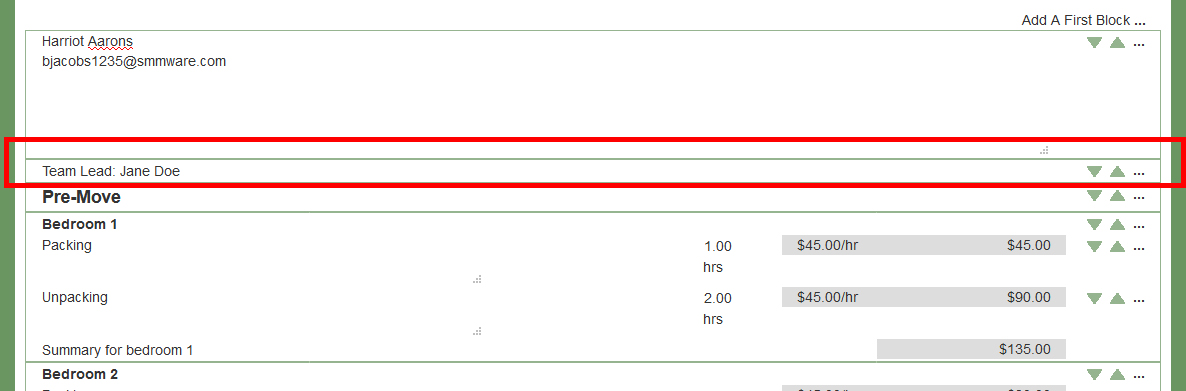
The ‘Header’ block simply provides large, bold text, and can be used to visually divide the quote into sections.
The ‘Group’ block allows you to insert line items inside it, and provides a subtotal for all line items it contains. It starts off without any line items in it, and you add those as you like.
When you add a new block from the top line of a group (as seen below), you need a way to tell SMMware whether you want the new block to come after the group, or inside it. If you click on a block name that ends in ‘Blck’, the new block appears after the group. If you click on a block name that ends in ‘Grp’, the new block is inserted into the group.
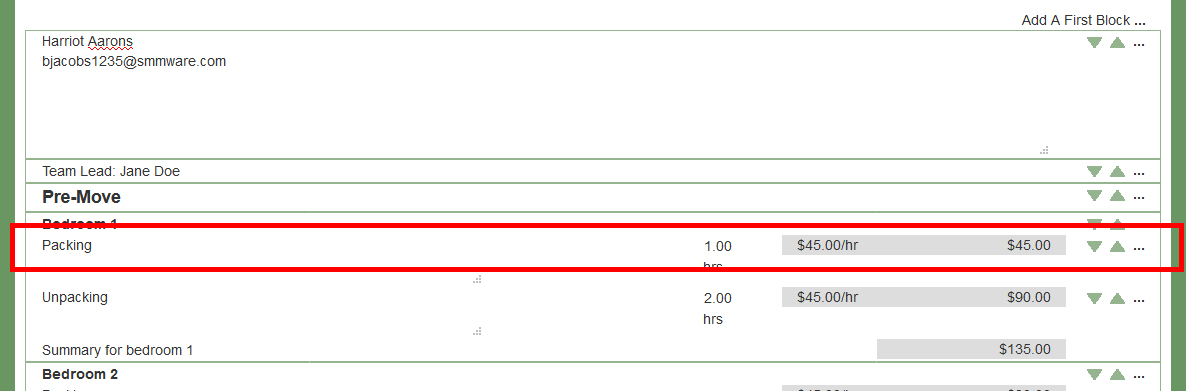
A ‘Labor’ block is used to indicate the hours worked. The rate comes from the overall rate if you are using a client fee model of ‘per job’ rate. If you are using a client fee model of ‘per Job Codes’, you will get a job code dropdown, and the rate comes from the job code.
A ‘Text’ block is simply that, a place you can provide additional explanation.
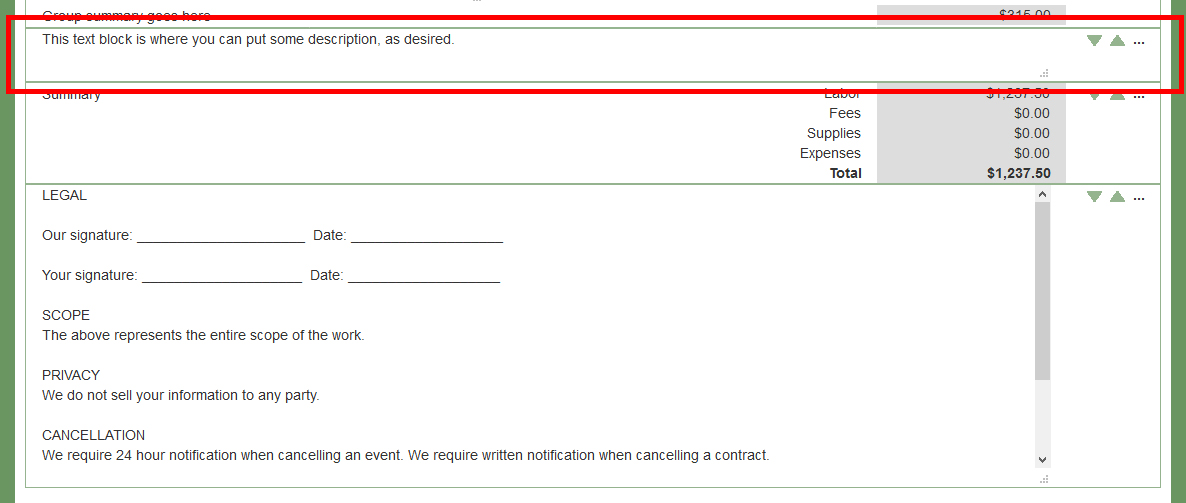
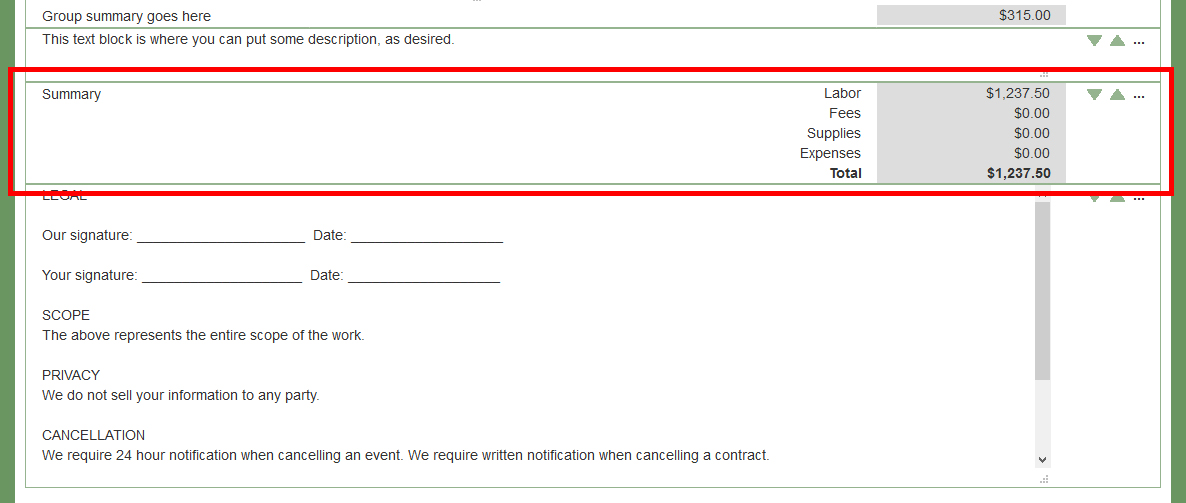
The ‘Summary’ block provides subtotals for different categories, and the grand total. These are automatically calculated. You can put the summary block where you like, whether that is the top, middle, or bottom of the quote.
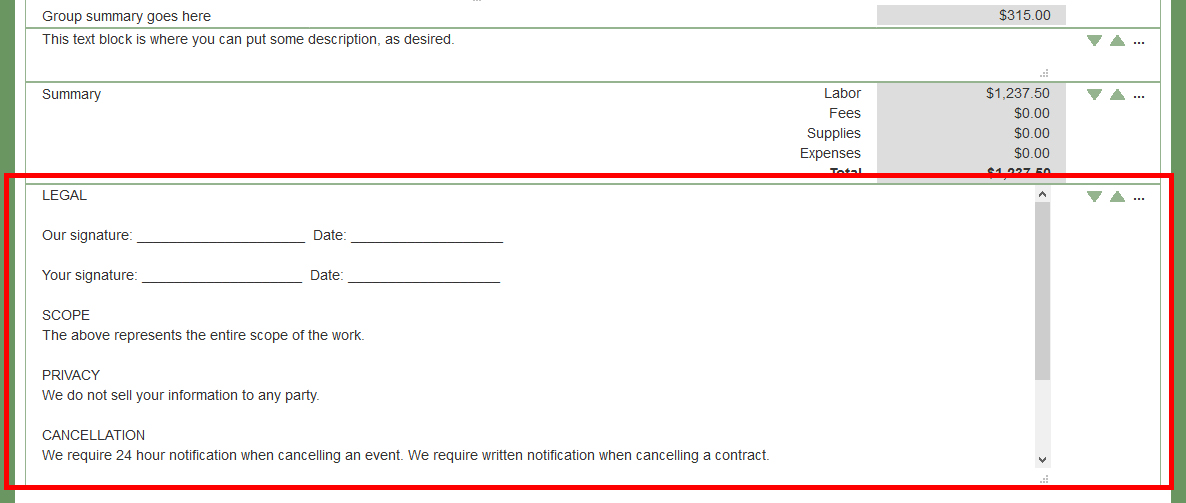
The ‘Legal’ block pulls in language which you can configure in the Settings Editor. Technically, it doesn’t have to be contract language, but that is the anticipated use.
Using Digital Signing of Sales Quotes
SMMware allows you and your customers to digitally add legally enforcable signatures to sales quotes created in SMMware.
Within the Legal Block of a sales quote, SMMware accepts special tags that tell it who needs to sign the quote.
Each tag consists of a ‘name’ section which holds the client name, and a second ‘contact via…’ section for how to contact that person, although it is just shortened to ‘via’. Be sure to include the semicolons as seen in the examples below.
Also, since a date field is mandatory, instead of making you include one, SMMware assumes that one is needed and inserts it automatically right after one of the tags below.
Here are some examples of tags:
• Using a name and email:_ [esign: Jane Doe via: jane@doe.com ]
• Using a name and phone number:_ [esign: Jane Doe via: (240) 285-4619 ]
Tag Shortcuts
SMMware also allows you to put a shortcut into the name section. If you enter ‘client’, SMMware will substitute the name from the Client Profile. If you enter ‘spouse’, SMMware will use the spouse name fields, again from the Client Profile. If you enter ‘sales’, SMMware will pull in the name of the lead salesperson. If you used a shortcut in the name section, you can use ‘email’, phone1, and phone2 in the ‘via’ section. Note, if you enter ‘phone’, SMMware will assume you mean ‘phone1’.
• Using the ‘client’ and ’email’ shortcuts:_ [esign: client via: email ]
• Using the ‘spouse’ and ‘phone2’ shortcuts:_ [esign: spouse via: phone1 ]
• Using the ‘sales’ shortcut: __ [esign: sales via: phone2 ]
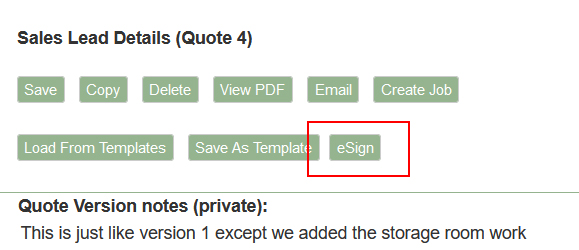
When editing the sales quote, you will see an ‘eSign’ button that you click on to initiate the process. SMMware then uploads the PDF to SignNow, our partner for digital signing. SMMware also sends the command to SignNow to invite the signees.
The User Experience for Signees
The Signees will receive either an email or text message from SignNow and click on the enclosed link. This will take them to a webpage under SignNow, where they will complete the signing process.
Notifications
SMMware will email the Lead Salesperson when the document is opened, signed, and when it is complete. So be sure that the lead salesperson is set for a given Sales Lead, and that they have a working email address in their Associate Profile.
As each signature is added to the document, SMMware downloads a fresh copy so that when the quote is viewed, it will reflect that signature. When the document is complete, the PDF seen in SMMware will have a final page with a history of the eSigning activities (opened, signed, complete).
The eSigning Log Page
Navigate Clients/Sales -> eSigning Log to review eSigning activity. The filter will allow you to refine the output listing.
Enabling eSigning, Purchasing Signature Requests
To activate eSigning, navigate the main menu to Admin->Settings, and edit Section 1) Basic Settings. For the setting ‘Should SMware integrate with eSigning, change the value to ‘yes’.
Next, navigate to Admin->Subscription Manager. There you will purchase a package of signature requests. You can purchase as you go, or you can set your signature requests to autorenew.
Each document that is submitted for eSigning consumes a ‘signature request’ (one per document, not per signer).
Also, be aware that if you cancel the signing process before completion, the signature request is already used, and not returned to your inventory. So be certain that your document is correct before submitting.