QuickBooks Desktop Integration
| Watch our YouTube video about QuickBooks Desktop Integration. For configuration and data import: https://youtu.be/s624CLHHE8g For using the integration: https://youtu.be/lpnvI2ODw3s (if this link is broken because we’ve posted a new version, go to our channel at https://www.youtube.com/SMMware to get to the new video) |
Enable the Integration with QuickBooks Desktop (QBD)
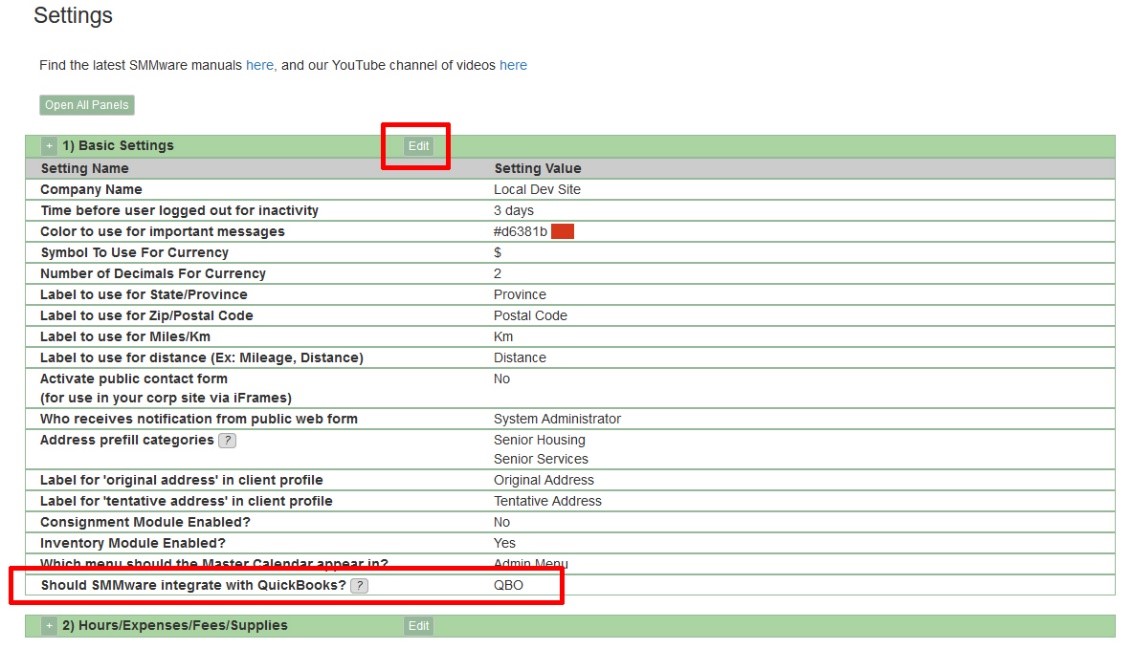
First, enable QuickBooks Online integration by navigating to Admin->Settings and editing “Section 1) Basic Settings”. For the setting “Should SMMware integrate with QuickBooks?” choose “QBD”. Note that this setting will only be offered to you if your user has a permission level of “Company Owner” (which is set in your Associate Profile).
Associate Permissions
For a given associate to see QBD related commands, their Associate Profile has to have ‘QBD Admin’? set to ‘Yes’. Only a user with ‘Company Owner’ permissions can set this permission for one of their associates.
Connect SMMware to QuickBooks Desktop
Download the ‘qwc’ file (qwc = QuickBooks Web Connector) and save it somewhere on the hard drive of the same computer that you have QuickBooks Desktop installed on. You will find the qwc under Admin->QuickBooks Desktop Settings. The link will only appear if your user has a “Company Owner” permission level.
Next you need to set a password. Only a “Company Owner” can set this password. Behind the scenes QuickBooks will present this password to SMMware each time it wants to communicate with SMMware. You’ll be giving this password to QuickBooks in a later step. The first time you connect QuickBooks and SMMware, you will be entering this password into QuickBooks. Once the connection is set up, you will not need to login every time (assuming you allow QBD to save your password).
To set the password in SMMware click on “Edit Settings” and on the following screen set your password.
Next, from within QuickBooks, click on “File” and then “Update Web Services”.

Next click “Add Application”

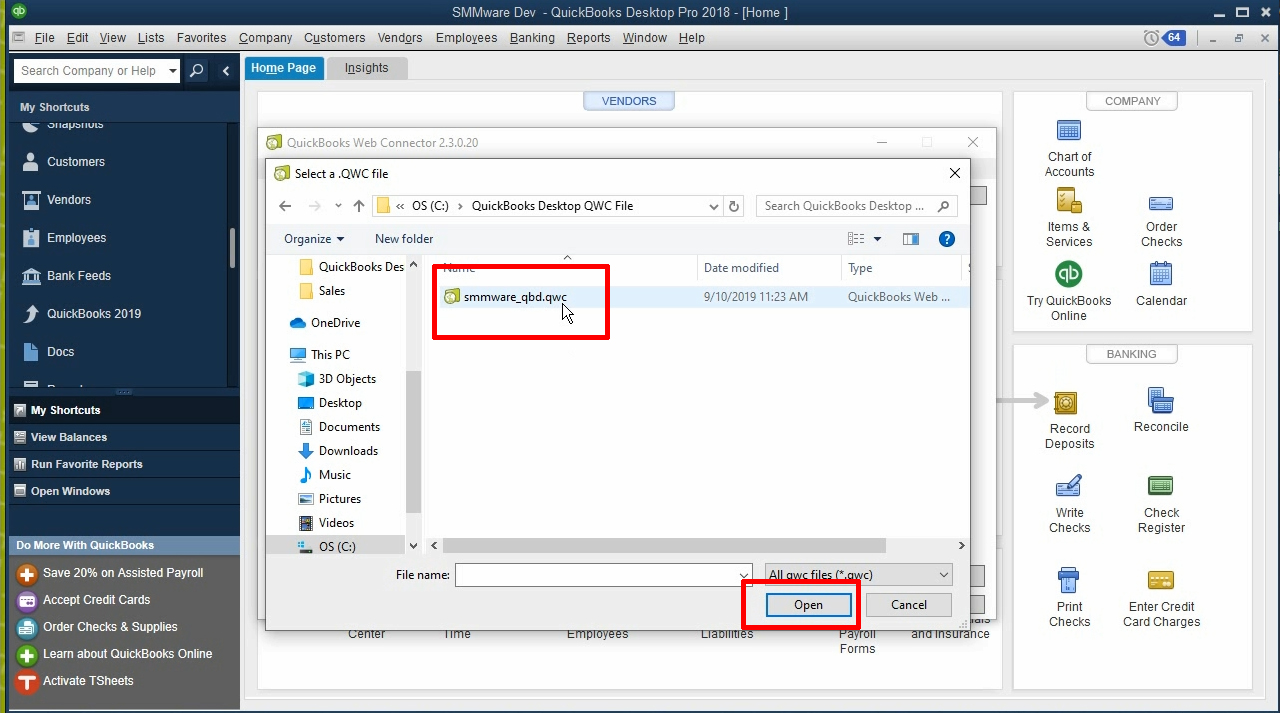
Next, navigate to where you stored the ‘qwc’ file and select it.
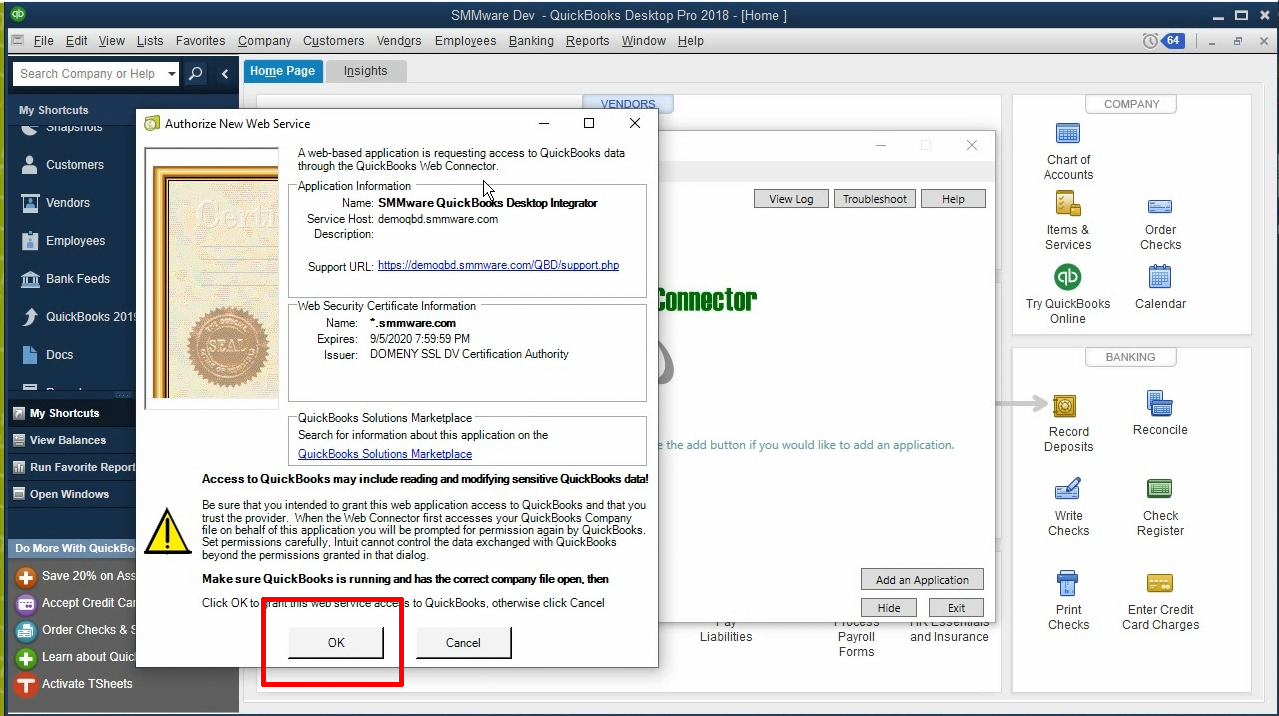
Approve the certificate.
Now check the box at the left of the new entry, and you will be asked for the password. Enter it, and then click ‘Update Selected”.
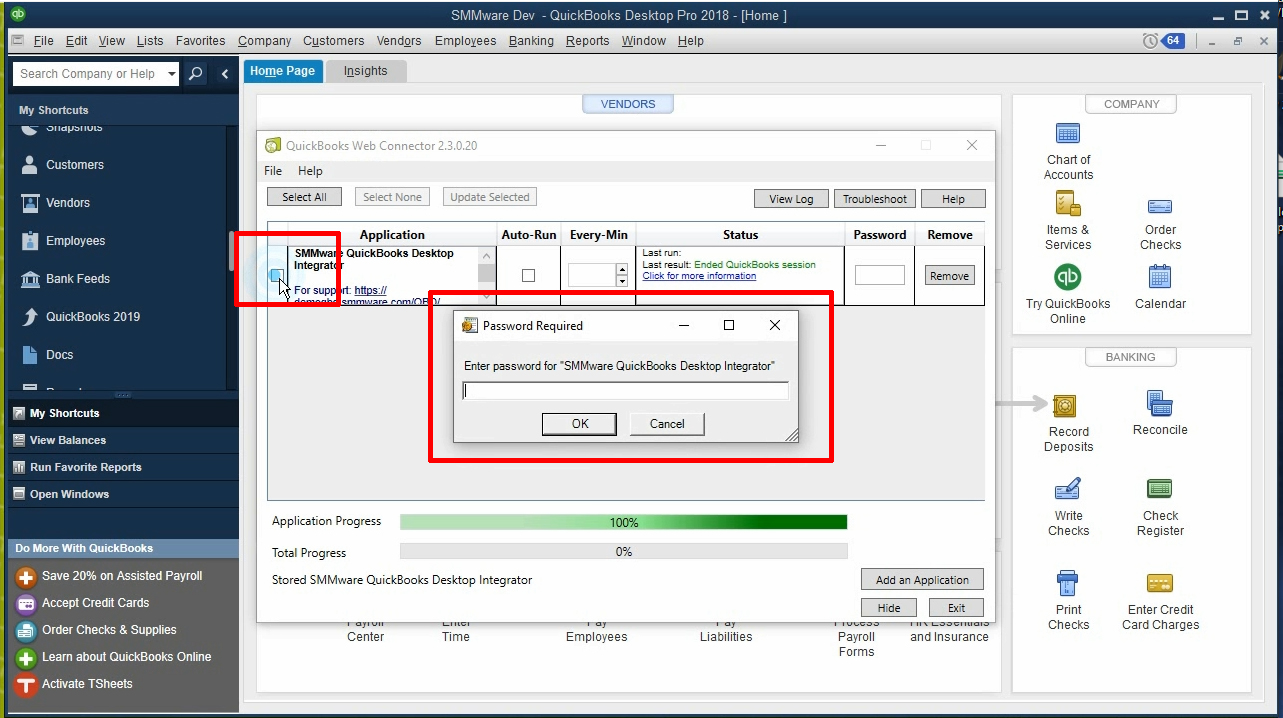
After you enter the password, you should be connected. You can verify your connection by clicking on “Update Selected”. The status column should show a message “No Date Exchange Required” in green (red means there is an issue, contact SMMware support for assistance).
Configuration and Importing Initial Data
Next you will import (from QuickBooks into SMMware) your Chart of Accounts, your Items, and your Payroll Items and (if applicable) Price Levels. This video shows you how to do so (as well as the other aspects of getting set up): https://youtu.be/px_scRleZfI
The above video will also walk you through importing your Clients, Vendors (Organizations), and Associates, and lastly with configuration settings.
If you need help with the above tasks, please feel free to contact SMMware support.
Moving forward, after this import operation, you will create clients, associates, and vendors in SMMware and allow them to be copied over to QuickBooks Desktop.
The system will not stop you from creating these items in QuickBooks Desktop but any of these items created in QBD will not be copied back to SMMware.
Post Import Actions for Associates, Clients, Organizations
After an import to SMMware, you will need to fill in certain fields to the profiles in SMMware since QuickBooks can not provide all the relevant information.
Associates: SMMware username and password need to be assigned. You may wish to enter an hourly rate, depending on how you are handling the entry of hours, expenses & miles, and payroll.
Organizations (Vendors): QuickBooks does not categorize vendors, so you may want to assign categories within SMMware. You may leave your vendors as uncategorized as well, if desired.
Clients: In SMMware, you may wish to fill in the “Referred By” fields, as well as the “Act as Reference” field if you know that the client is willing to act as a reference. Lastly, a SMMware client profile can have optional fields not present in QuickBooks, so you may wish to enter information for these fields.
Normal Day to Day: Copying Items to QBD
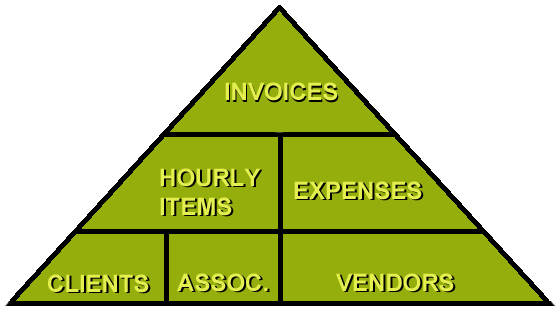
There is a hierarchy of information in SMMware, as illustrated in the diagram below, with a given level being dependent on the lower levels. Invoices can have hourly items, and each one of those in turn require clients and associates. When SMMware copies an item, it also copies any dependent items. It also remembers if it has already copied a given item over and doesn’t do so again.
Listed below are the places where you can enqueue items over to QuickBooks Desktop
- Admin->Invoice Manager
- Associates-> My Hours/Expense/Mileage History
- Associates->Associate Manager
- Clients/ Inquiries -> Client Manager
- Organizations/Contacts -> Organization Manager
For a given item type, SMMware lets you copy over either an individual item or, for a listing, it lets you copy over all the items in that listing.
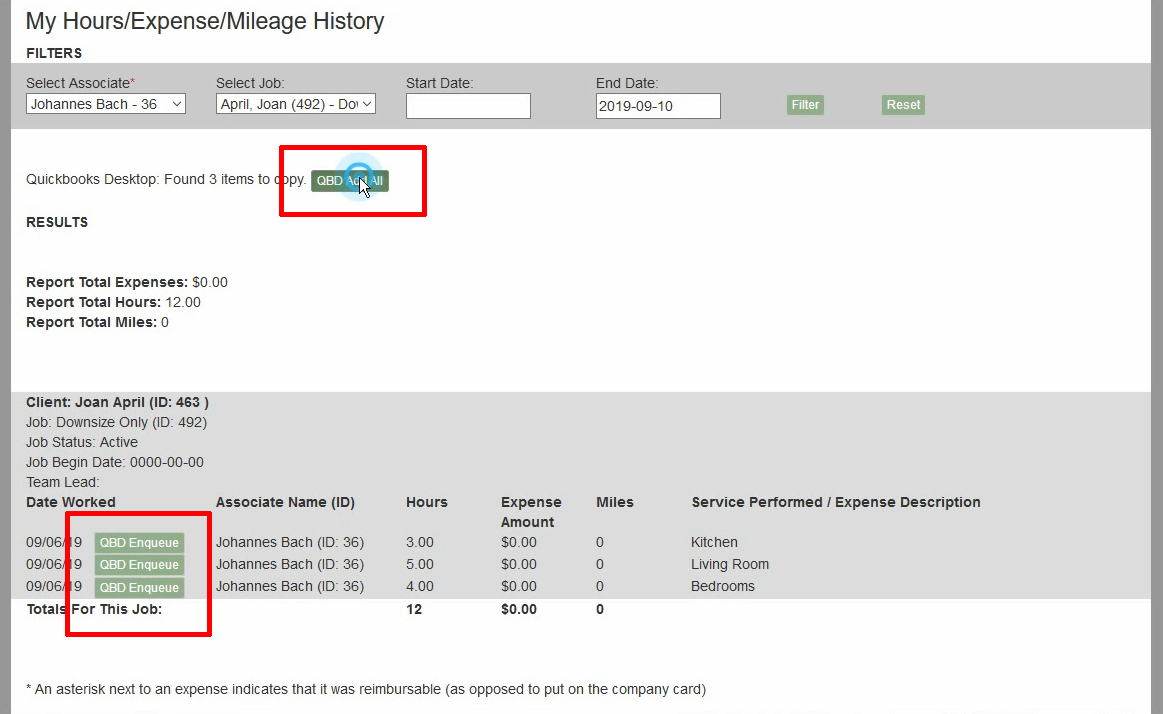
When looking at a listing of Invoices, you will see the button “QBD Enqueue All”. When looking at an individual invoice, you will see the button “QBD Enqueue”. There are similar buttons for clients, associates, and for hourly and expense item entries.
QuickBooks has designed a two step process for copying information from 3rd party applications like SMMware down to QuickBooks Desktop.
- Within SMMware, add items to a queue. This queue is simply a list within SMMware of items that you want copied to QBD.
- Within QuickBooks, run a synchronization command using the “Web Connector”, which causes QBD to contact SMMware and ask for items to copy down.
For Step 1, you will see buttons to enqueue various items, such as invoices, Hours/Expense entries, and even individual Clients, Associates, & Vendors. The screenshots below show you where to find these buttons.
Below is the screen where you can enqueue Hours and Expense items, by navigating to Admin-> My Hours/Expense/Mileage History.
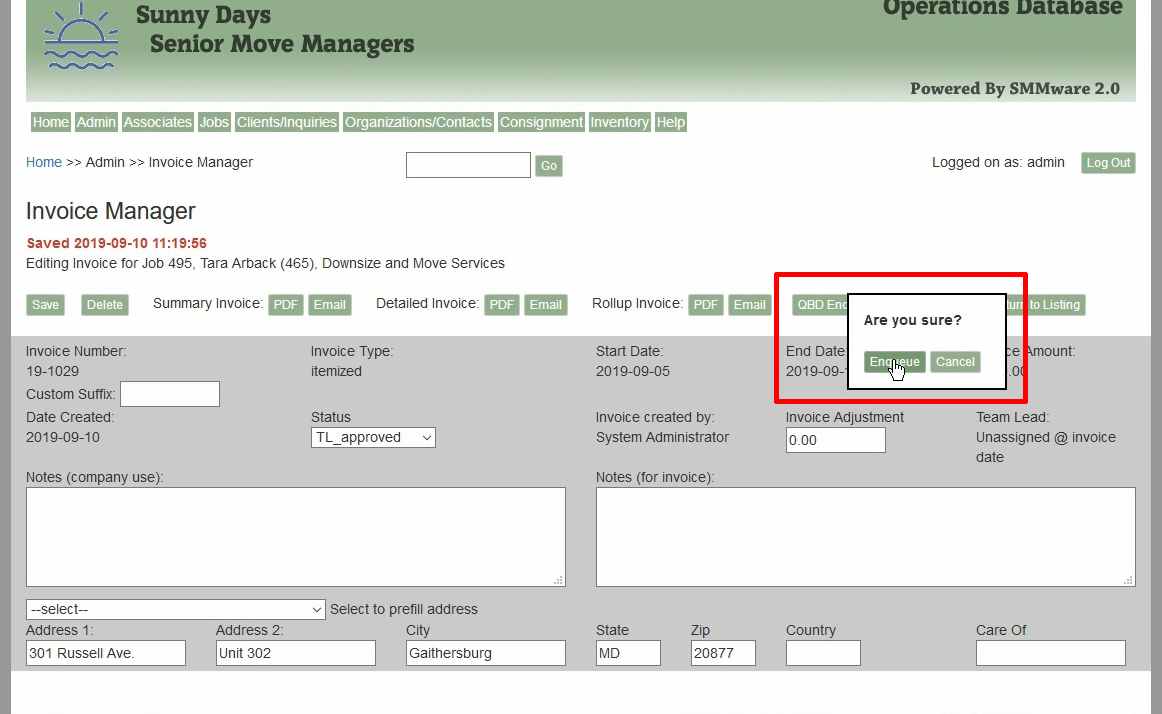
The screen below shows where to find the QBD Enqueue button for an invoice.
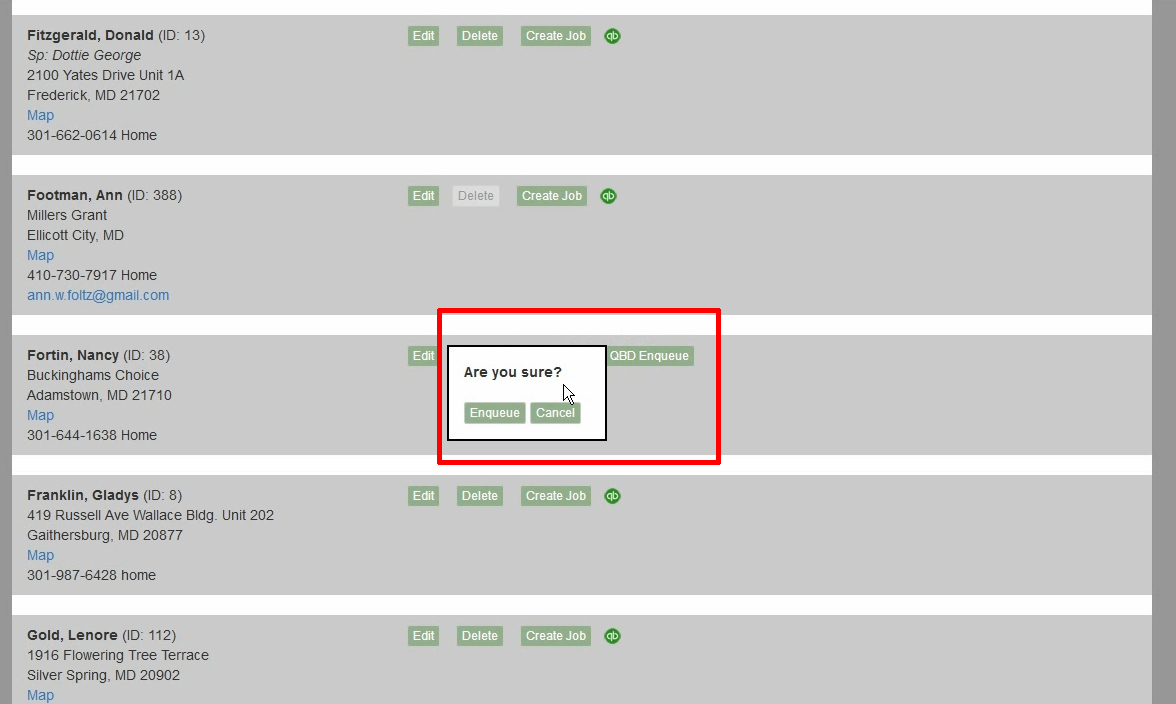
The screen below shows where to find the “QBD Enqueue” button for a client.
Once an item is in the queue, a blue ‘QB” icon will be displayed. After the item has actually been copied to QuickBooks, the icon will be green.
![]()
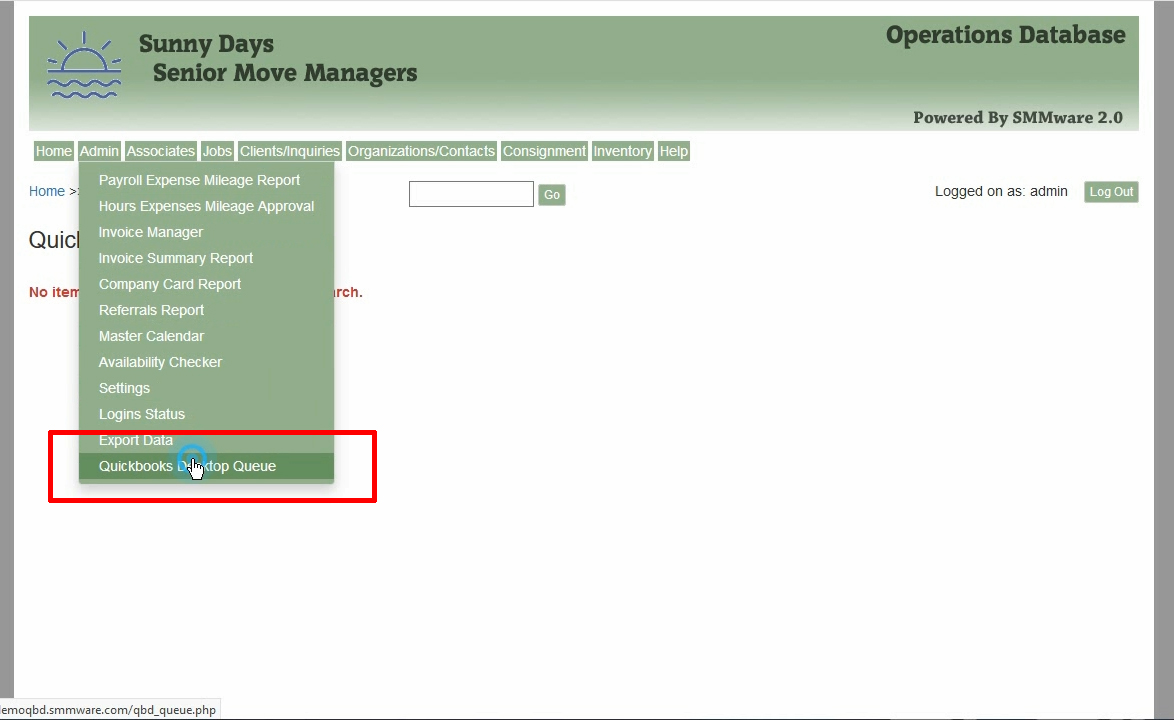
SMMware allows you to review the items currently held in the queue, by navigating to
Admin->QuickBooks Desktop Queue.
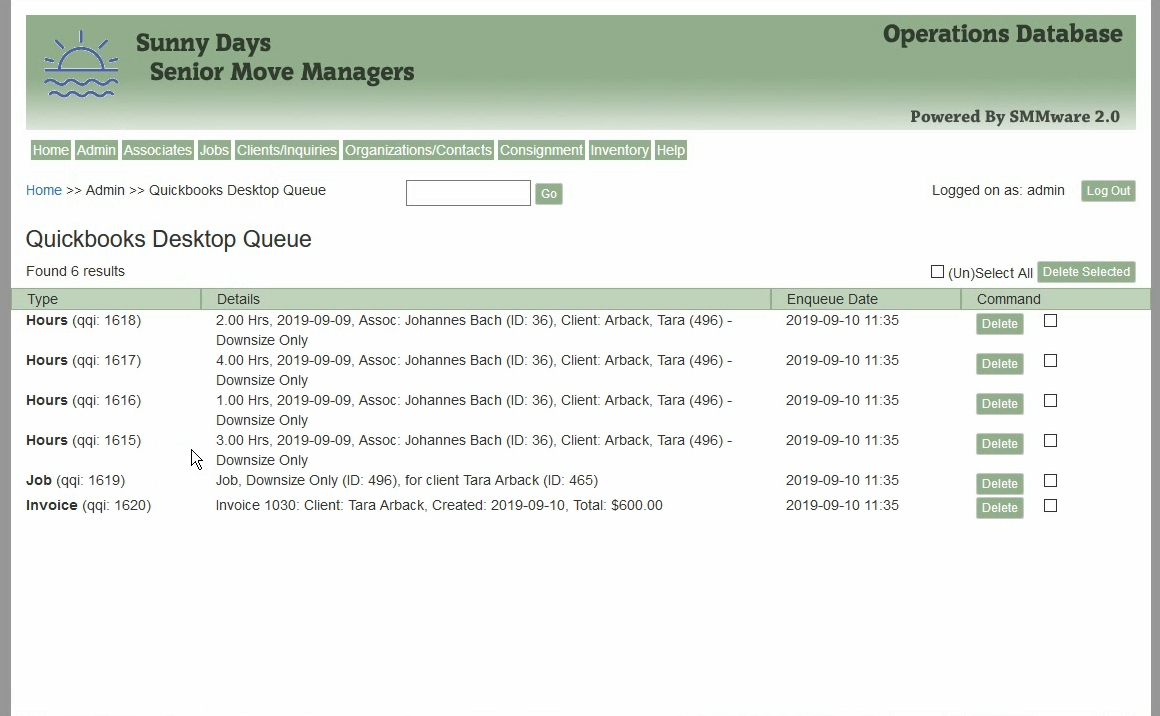
Below is an example of various items in the queue.
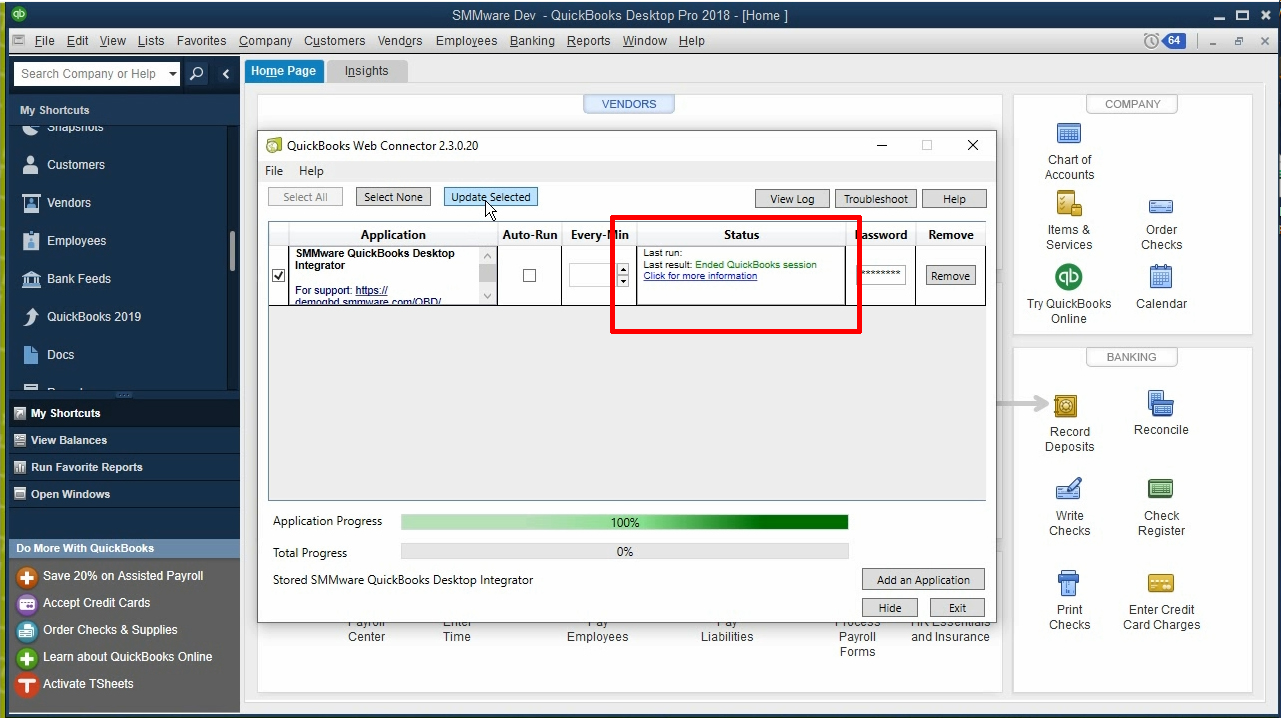
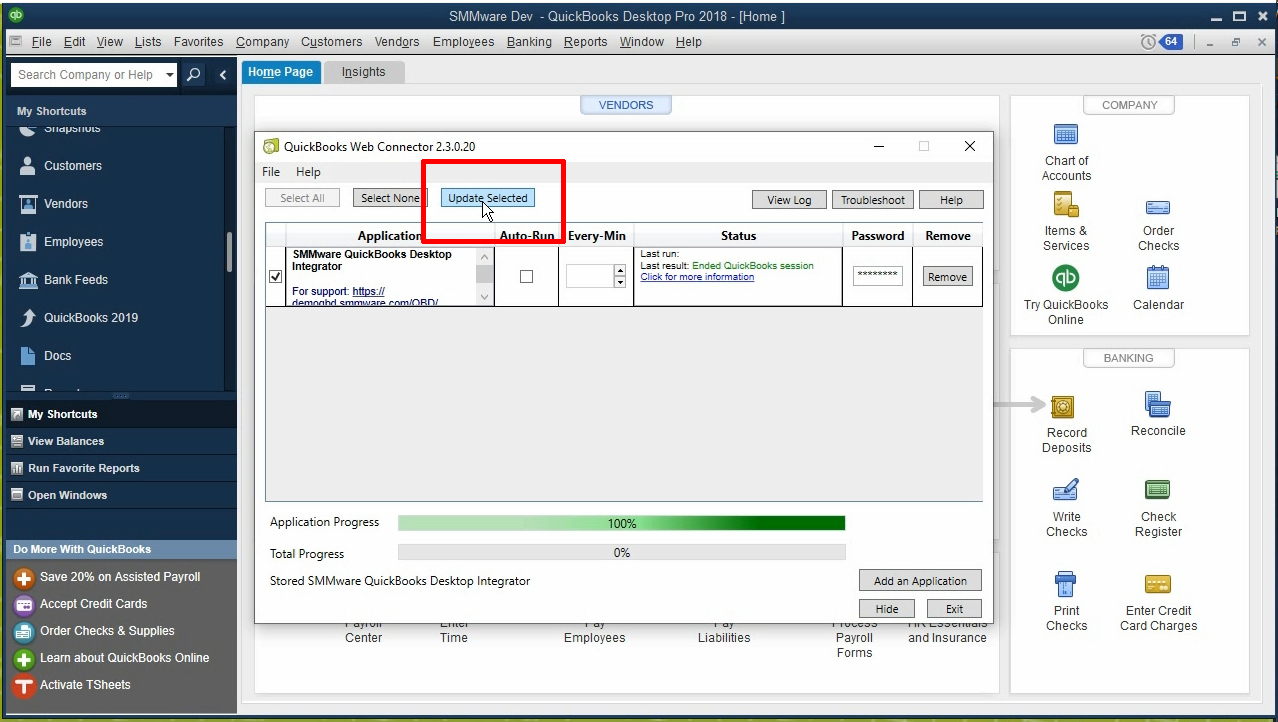
Step 2 is performed within QuickBooks Desktop. In the File Menu, click “Update Web Services”, after which the Web Connector popup will appear.
To initiate the synchronization, make sure the checkbox to the left of “SMMware QuickBooks Desktop Integrator” is checked, then click on ‘Update Selected”. QuickBooks provides a progress bar to help you monitor how much longer the process will take.
If there are no errors, you will only green in the status box, as shown below. If there were to be any errors, you would see text in a red font.